
A customer wanted to know Keith Shaws Modifications of our 1905 Wright Flyer. Keith is an experienced modeler. A member of the AMA Hall of Fame. His advice on any model is well worth reviewing. Here are Keith’s views as written myself and on of our builders:
Shop the 1905 Wright Flyer Kit
Keith’s Changes for Transport and Scale Looks
Hi Dave,
………….I really didn’t do much of anything to make the Wright fly “better”. Most mods were for convenience and scale appearance.
1) Made the front “head” removable so that I can transport it in my minivan along with other airshow planes.
2) Made the fantasy long range tanks to house the four A123 cells. Voltage/current/power is virtually identical to the 3s Lipo you spec. I just prefer the safety of A123 cells.
3) Used a tan magic marker to draw fake ribs and spars on the bare foam before painting with the Almond High-heat Rustoleum.
4) Made a dummy engine, sprockets and chains. Found a toy fireman that was just about the right scale for Orville. Sewed a suit and made a high collar, tie and cuffs for the figure.
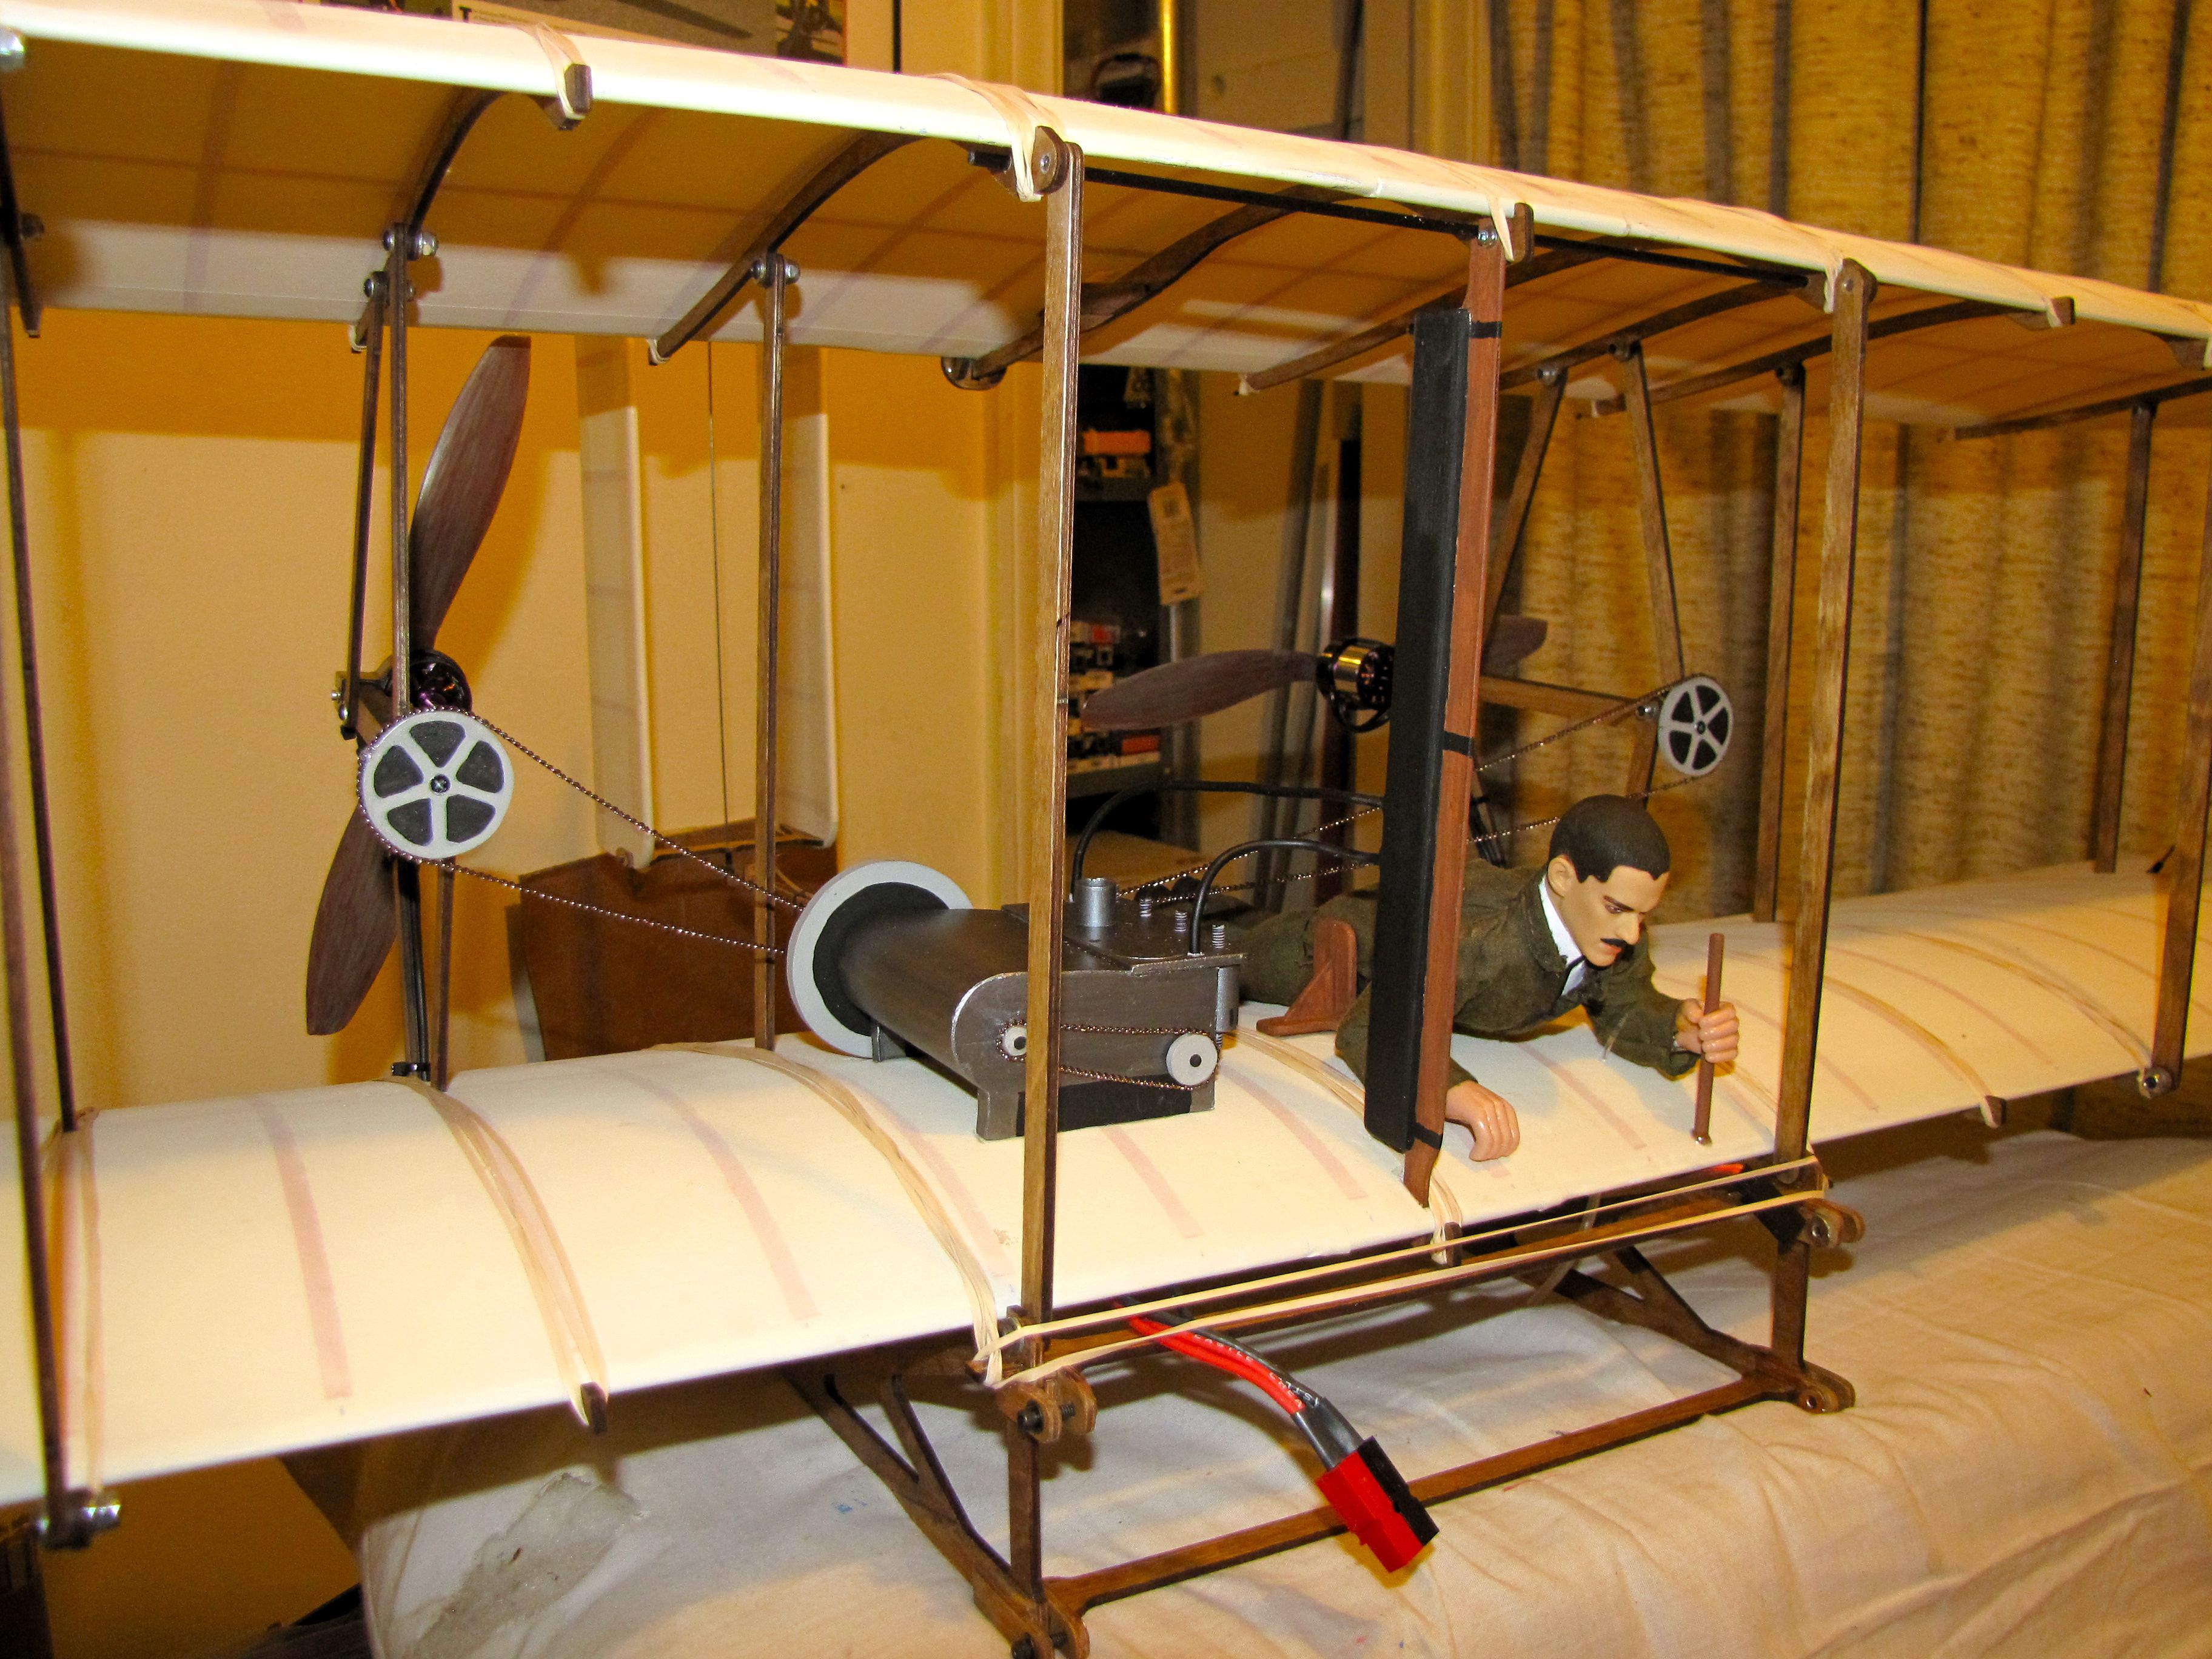
Keith’s dummy engine, sprockets and chains. The tan rib lines show through the paint on the foam wing.
Keith’s Changes That Help It Fly
5) My flier seems to need more positive elevator trim than yours at the given CG. I move my CG back to about 7/8″ back of the leading edge to reduce the front surface loading. This could be due to a slightly different camber profile than yours. Hard to guess when using the heat gun, ribs and rubber band method.
6) I used #117 rubber bands from OfficeMax rather than linking two #33 together.
7) I guess there were a couple of improvements now that I think on it. I found the vertical rudder hinge wire far too flexible and was the cause of the slow rudder oscillation. I used 3/32 instead of the spec’ed .055.
8) The roll axis was a little vague, and I suspected that the wing warping pushrods were buckling under load. I sleeved the .055 wire with 1/8th O.D. aluminum tubing. Now the wing warping is *almost* as positive as ailerons. Of course there is still adverse yaw from their use, so I mix in about 10% aileron-rudder coupling.
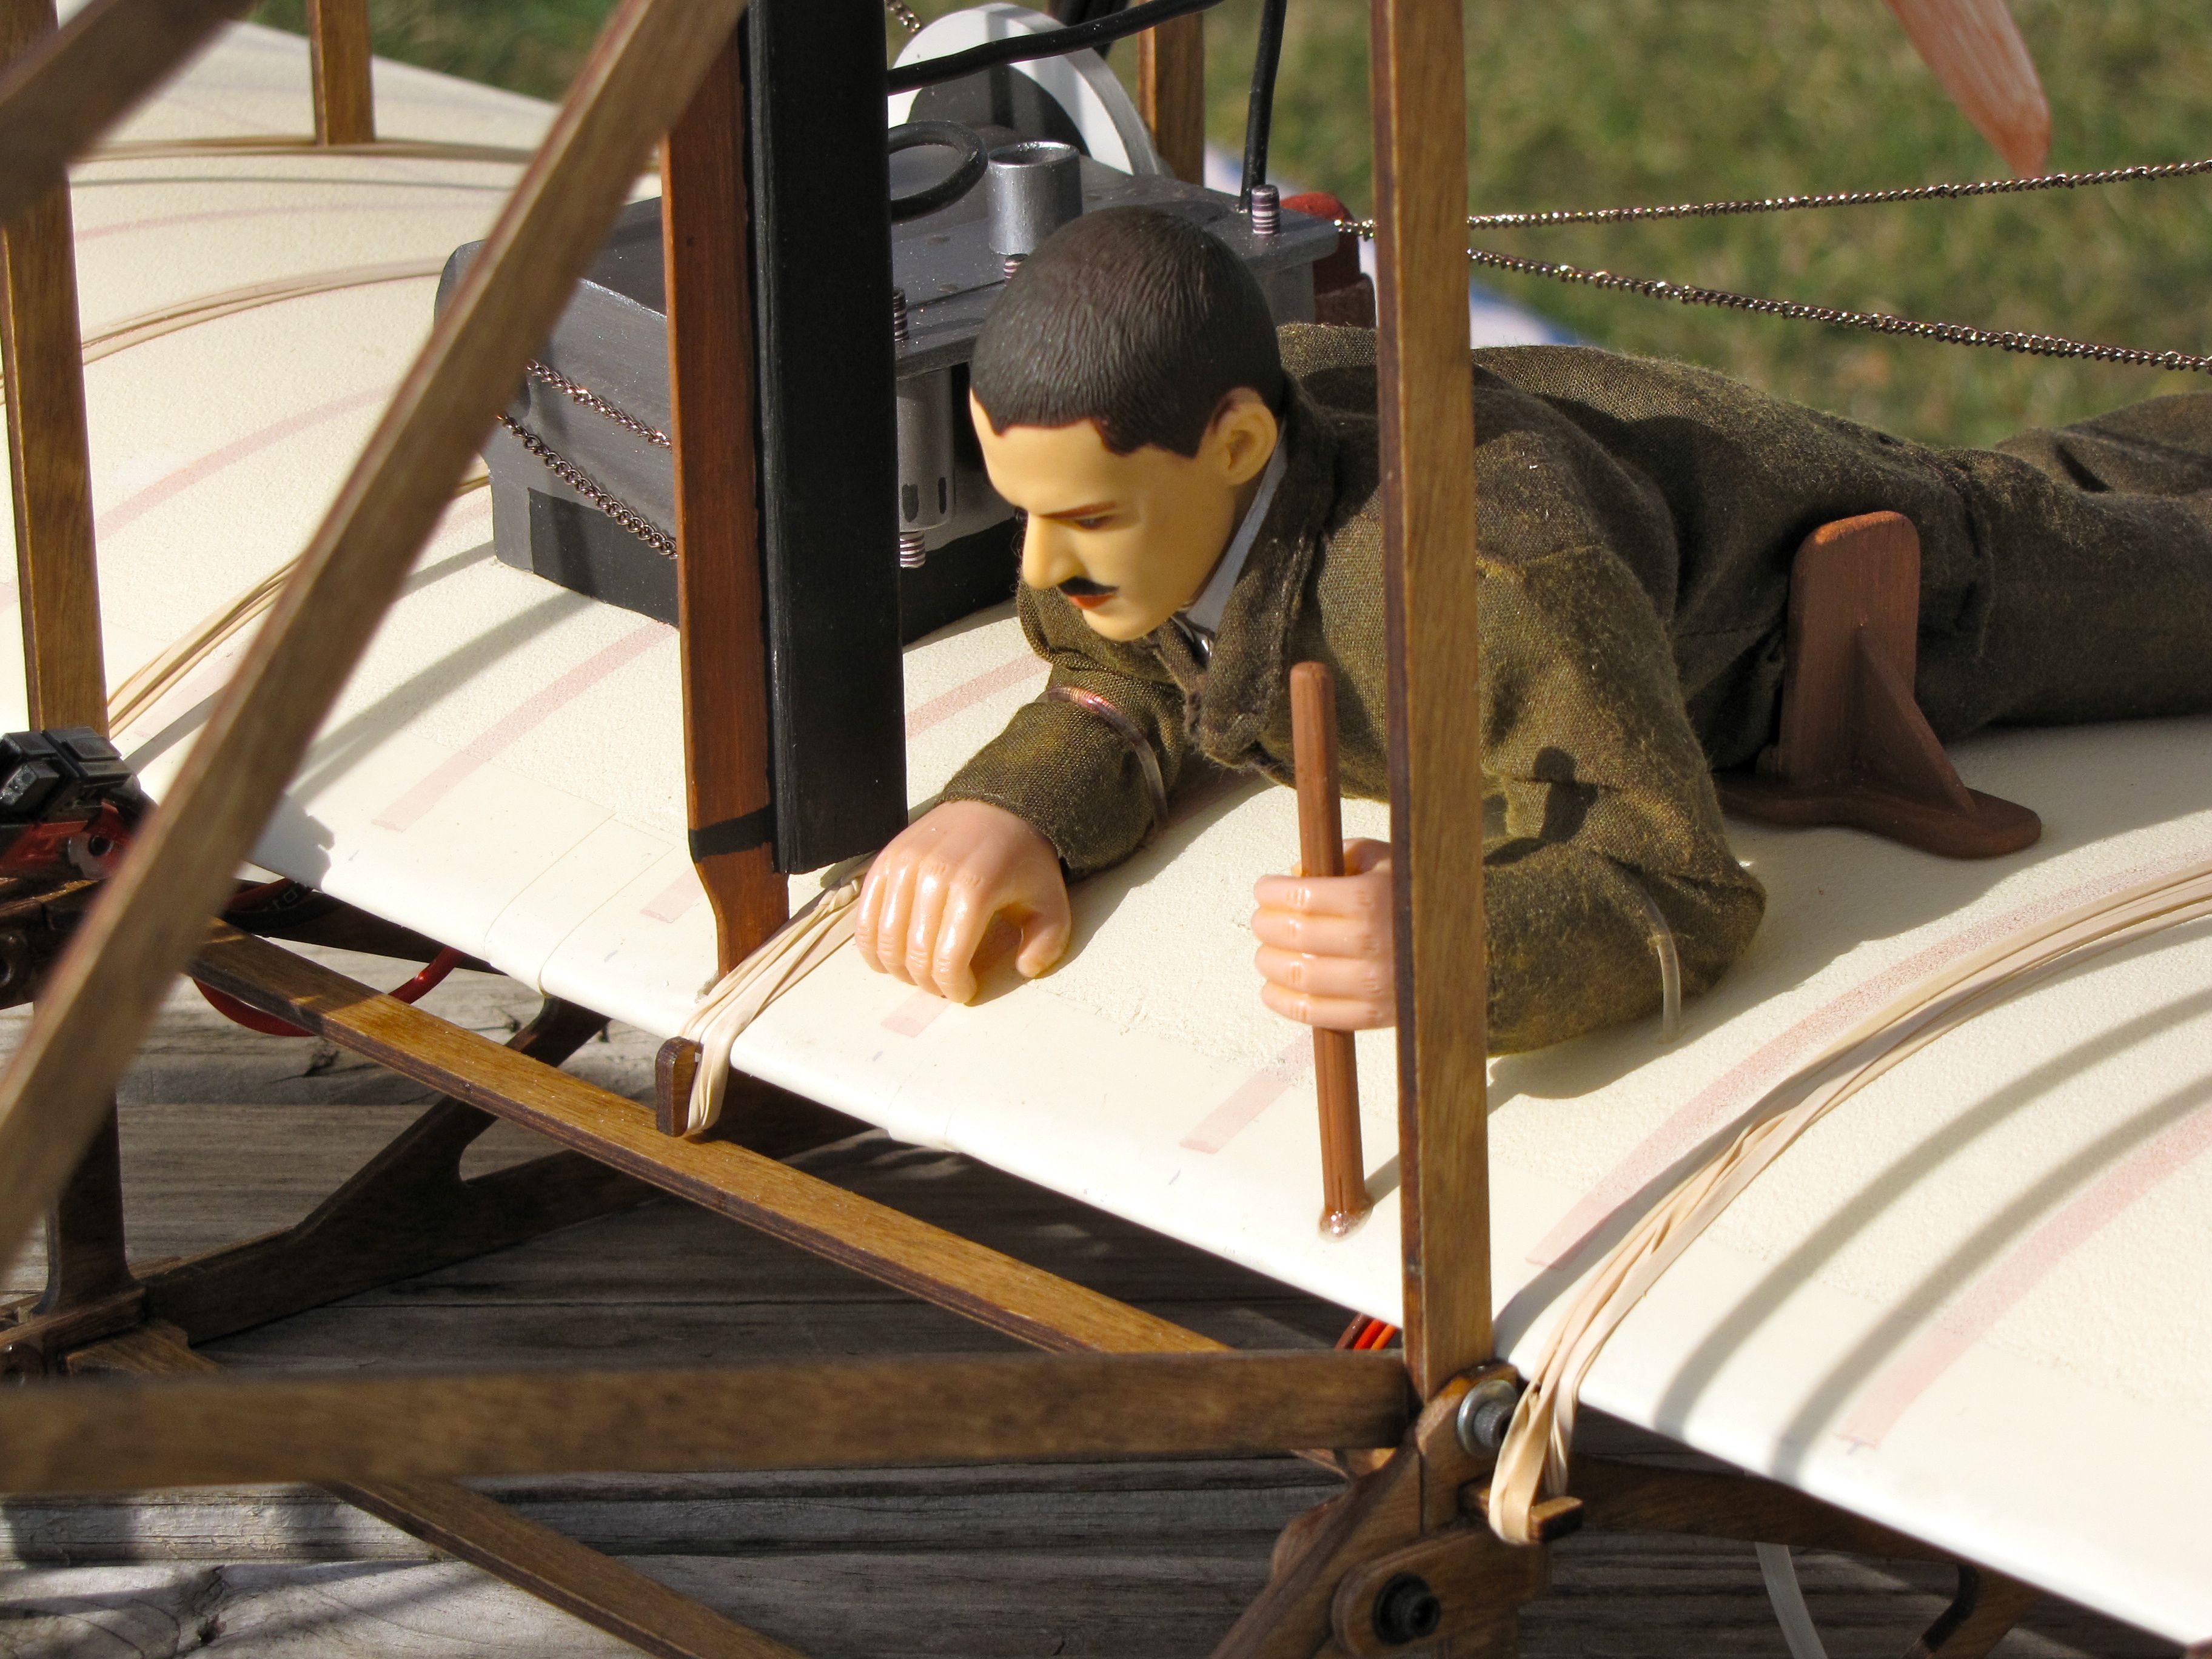
Keith’s Orville figure, made from a toy fireman, in the suit he sewed.
Hope this helps him,
Keith
Dave’s Advice on Moving the CG
Note’s from Dave; I do remember Keith mentioning that he runs the CG a bit further back than I suggest in the plans. He may have forgotten to mention that in the above letter. I do advise however that you start with the CG where suggested and only after a couple of flights, start to adjust it rearward. Any such adjustment should be made in careful small increments. 1/4″ is a long way to move a CG. Try to move it 1/8″ per flight until you find the uncomfortable location then readjust slightly forward. This is the method I used to arrive at the instructed location. For me it feels tail heavy any further back. By tail heavy, I mean, the model begins to hunt about the pitch axis. Keith feels that location is a bit further back and perhaps he is correct. Someday I may start moving it back again on my own model. Just bear in mind, you’re not experimenting to start where I suggest in the instructions. I want you to have a successful test flight.
Spare Parts and More on Keith’s Flyer
We sell the 1905 Wright Flyer kit accessories and the Depron foam wing set on their own.
Read more about Keith’s build: